

How To Repair Shattered Fiberglass Car Body

By Tsukasa Azuma
Last updated Apr 26, 2022
0 comments
Fiberglass is an adamant material, but it may also develop cracks or holes under rough conditions or if confront any blow. There are several methods for repairing it, only using a fiberglass repair kit is probably the easiest solution. There's no demand to take whatever prior experience because a kit includes all the materials and directions required for a DIY project.
Repair Fiberglass
To know its use, you offset accept to about the materials come with a standard kit and the boosted items y'all may need for repairing the crack or hole.
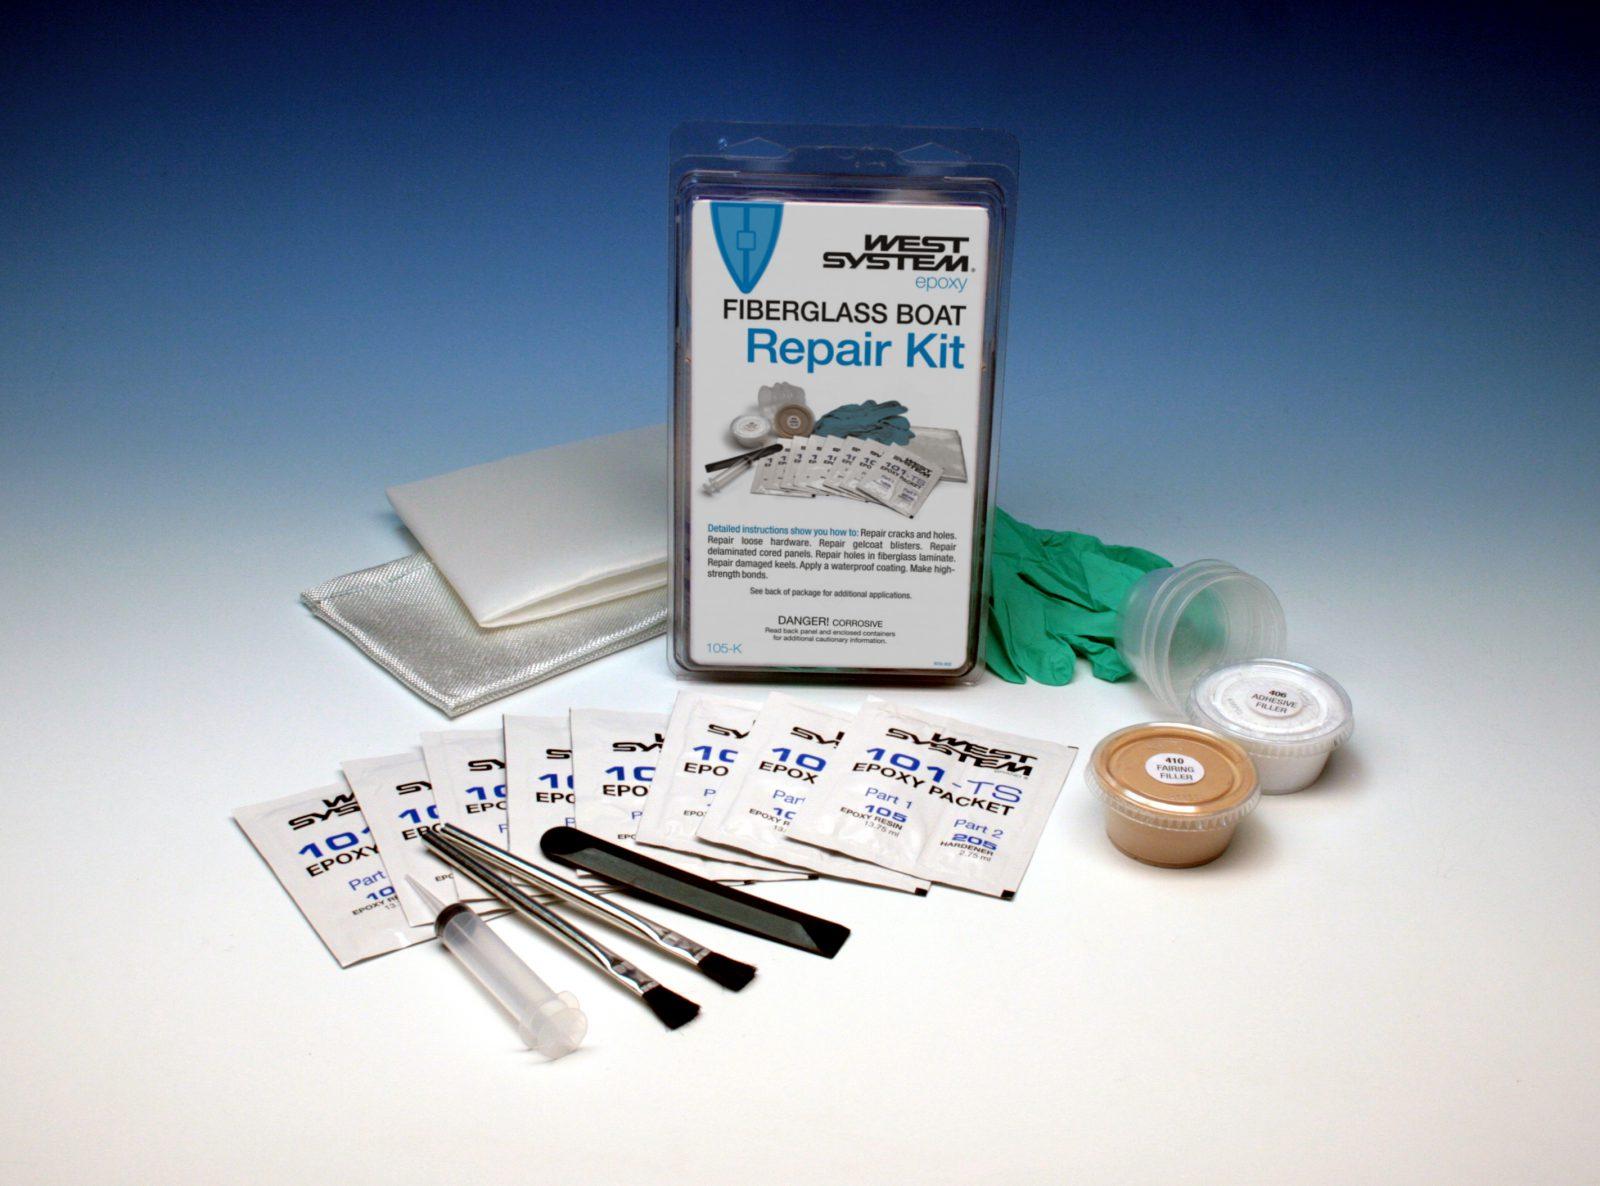
Materials in a Fiberglass Repair Kit
- Fiberglass resin
- Hardener
- Plastic spreader
- Fiberglass cloth
- Mixing stick
- Mixing tray
SEE MORE:
- Condom tips to dispose of old gas from your car
- The complete guide to plough off a car warning
Additional Items Required for the Projection
- Acetone or lacquer thinner
- Sandpaper lxxx and 180 grit
- Sanding block
- Measuring cup
- A paintbrush
- Rubber gloves
- Scissors
How to use a fiberglass repair kit to set a damaged expanse
Let's have a look at our fiberglass repair guide with the step by step instructions:
Step 1: Cleaning the damaged area
Apply acetone to clean the damaged area. If y'all don't have it, soapy water will as well exist useful for removing the clay, oil, grease, and other ingredients. Allow it air-dry completely or use a piece of dry cloth to wipe the area.
Pace 2: Sanding the damaged area
Utilise the Sandpaper 80 grit to sand the damaged area. It volition remove all the rust, paint, primer, and gel-coat. Sand the other side of the damaged spot too because repairing both sides will strengthen the surface. Clean the expanse again with acetone or soapy h2o.
Step 3: Making resin and hardener mixture
Cutting several pieces of fiberglass material to one-inch larger than the cracked or holed area. And then mix the resin with the hardener in the mixing tray. Blend in pocket-sized amounts and recall that the working life of the mixture volition be nearly eight to 12 minutes at 75°F. You accept to utilize ten drops of hardener for one ounce of resin.
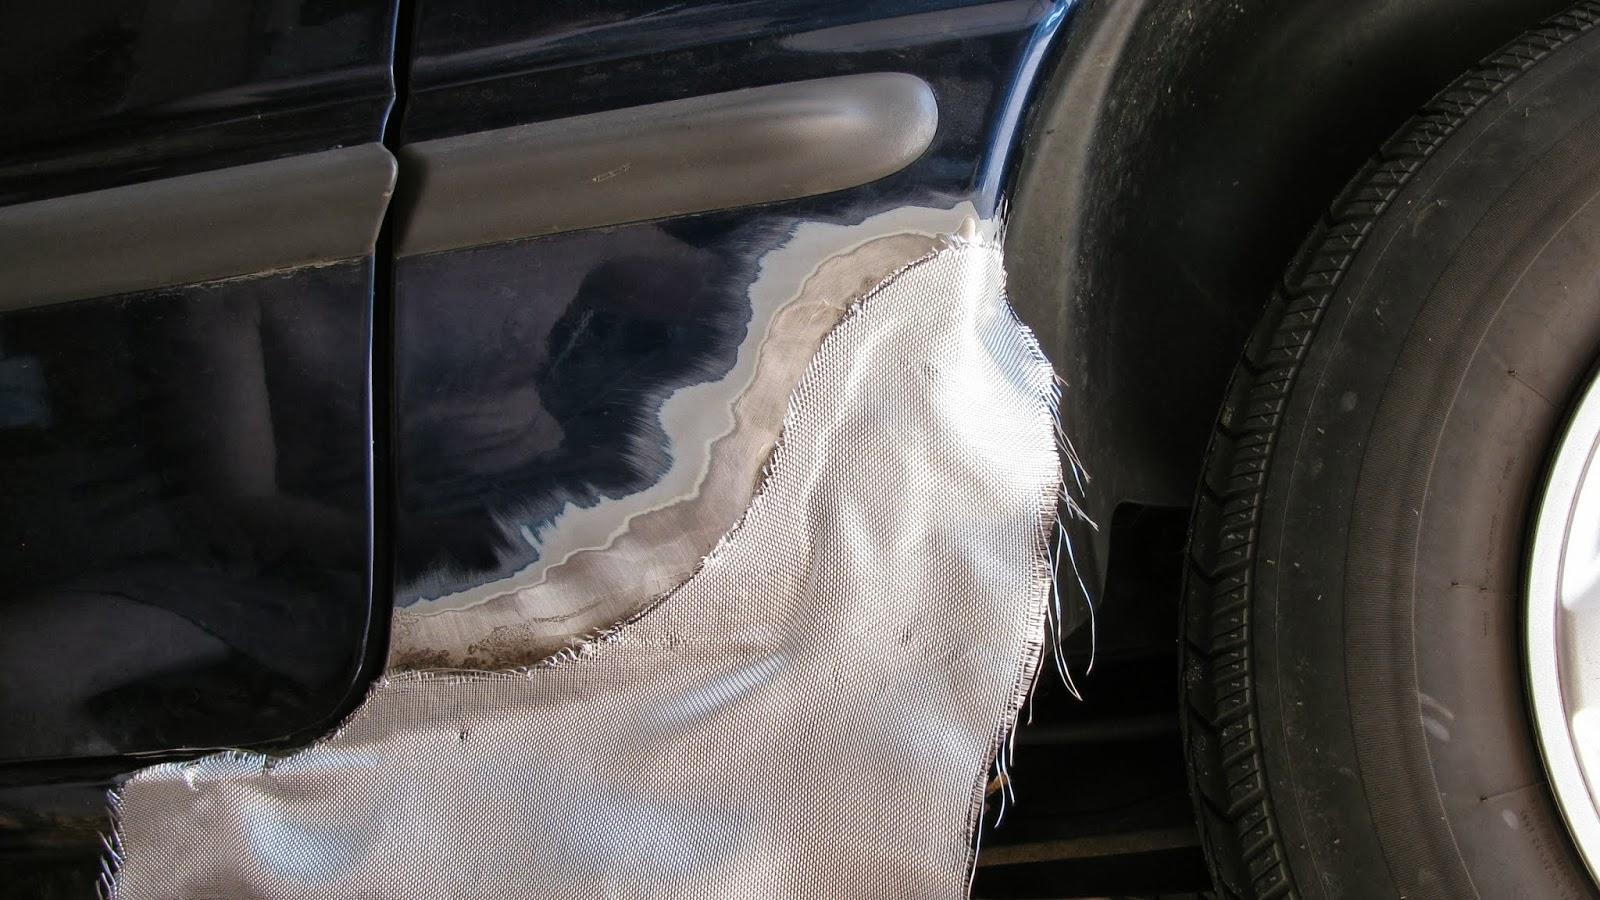
Footstep iv: Applying a glaze of mixture
Apply the paintbrush to use a coat of mixed resin on the damaged area. The resin should cover the area that extends 2 to iii inches beyond repair. Then, place a slice of fiberglass cloth onto the damaged spot and saturate it with the mixed resin. Keep applying layers of cloth pieces and resin until the area is repaired completely. Follow the same procedure for the both sides.
Stride five: Drying so sanding the damaged surface area
Let the area dry properly. The curing volition be amend if the temperature of the place remains at 75°F. After that, sand the surface area with Sandpaper fourscore grit. Y'all can employ a body filler at this phase to smoothen the small curves.
Stride half-dozen: Sanding the contour of the repaired area
Use the Sandpaper 180 grit on the contour of the repaired area so that it blends with the rest of the surface.
Bank check out this video for more details most how to apply fiberglass repair kit
Now, your car is ready for the paint job. While using the fiberglass repair kit, always remember to use hand gloves while touching the fiberglass material and resin mixture. Too, dump the unused resin considering putting information technology dorsum into the container will spoil the residual of it.
Next week, we will bear witness y'all more car maintenance tips similar How to supervene upon Windshield or Easy means to unlock your car, thus, don't forget to follow Machine FROM JAPAN to read more than useful machine information.

How To Repair Shattered Fiberglass Car Body,
Source: https://carfromjapan.com/article/car-maintenance/step-step-guide-use-fiberglass-repair-kit/
Posted by: fordargift.blogspot.com
0 Response to "How To Repair Shattered Fiberglass Car Body"
Post a Comment